Easy No Knead Overnight Focaccia Bread
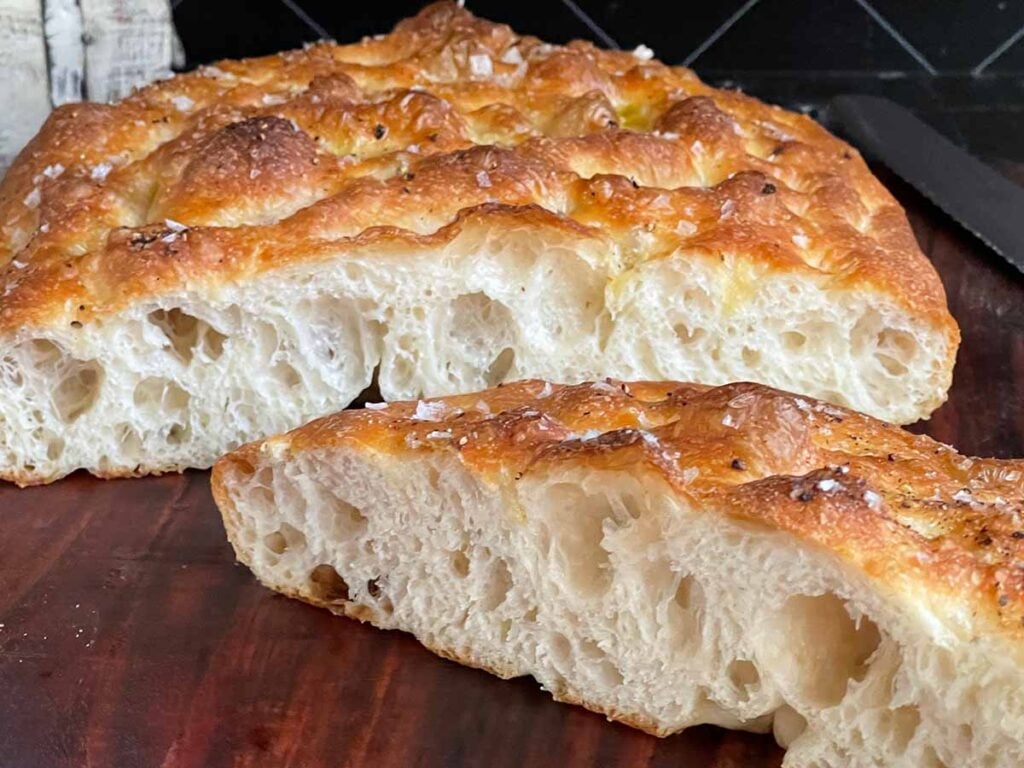
This no-knead overnight focaccia bread is one of the easier loaves of bread to make. What’s ironic is that as easy as it is, the flavor of the bread makes this one of our favorite breads to make.
🤔 Why This Recipe?
Simple ingredients make a bread that tastes better than anything I have had at any restaurant. We’re always amazed at how that works out sometimes.
Well, this focaccia bread is just that. Nothing eating out has come close to this. We have an awesome sourdough that, quite simply, is my favorite bread. We make it weekly.
But this focaccia bread has a good chance of taking out the sourdough. I haven’t decided yet, but man, is it good.
As with all our recipes, we test. We test a lot. We have made this focaccia as a one-day recipe. We have tried a two-day rest focaccia. We’ve also tried it will all sorts of variations of toppings.
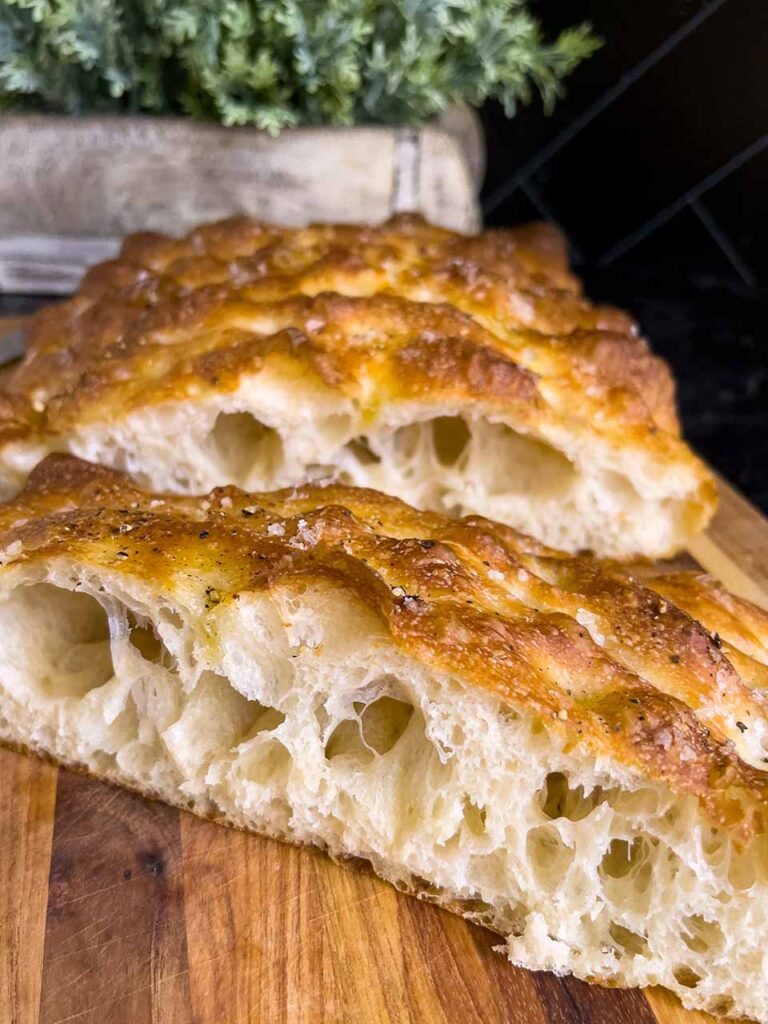
What we came up with … the version we felt was the most flavorful was this recipe. It hits all the right notes. It’s crispy with tons of flavor.
The salt and pepper with little pools of olive oil in the dimples of the bread with that crusty bottom made such a perfect bite.
No lie, the two of us ate 3/4 of it in one day. We took some bites, returned 5 minutes later, and ate some more. And then we did it again. And again. And again.
In the end, there wasn’t much left. A word of caution, don’t eat 3/4 of it in one sitting. It’ll be hard to resist. You’ve been warned. Honestly, I’m not that sorry; it’s that good.
Sometimes less is more, and that’s my opinion with this fabulous focaccia!
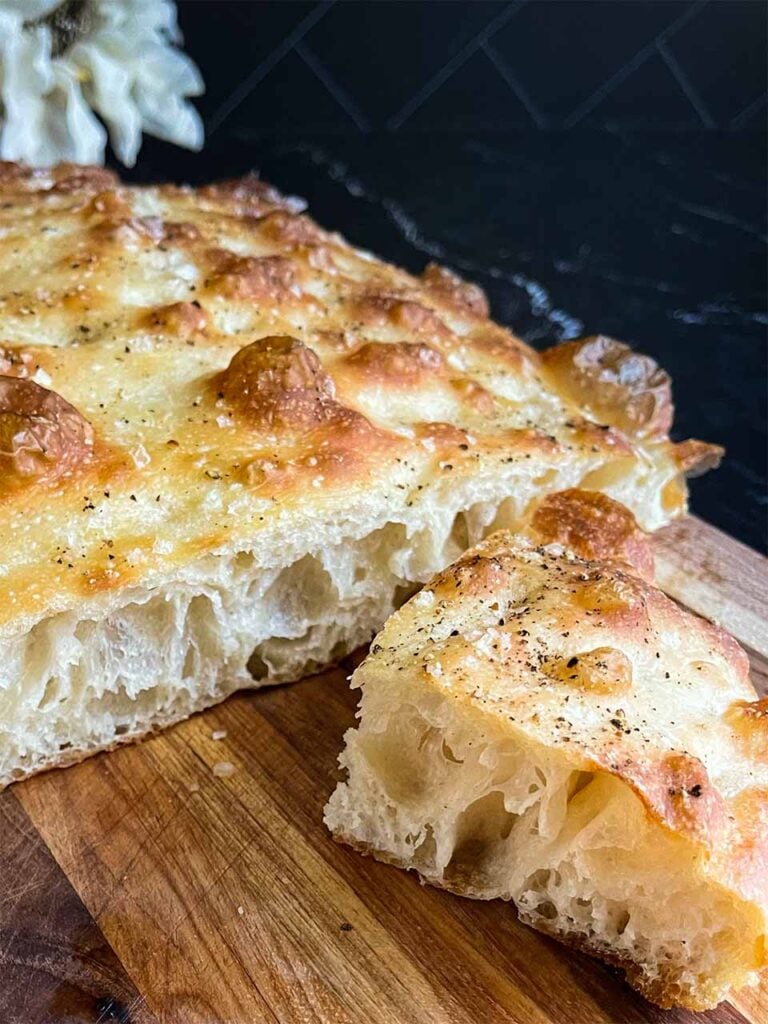
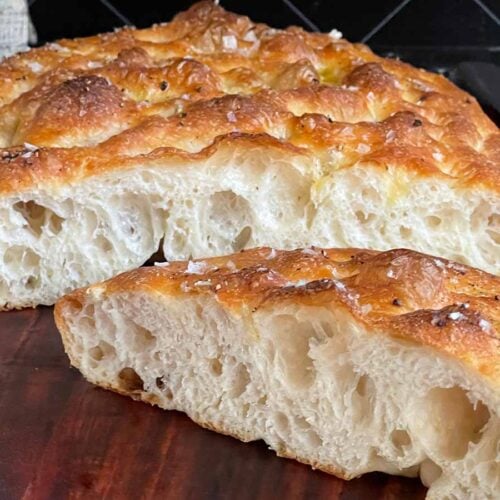
A golden brown, flavorful bread with a crispy top and bottom crust and an amazing crumb, topped with olive oil, salt, and cracked black pepper. Simple and delicious.
Plus, it’s so easy to make! No mixer, no kneading, no crazy techniques. You’ll love this!
👩🏽🍳 How To Make This Overnight Focaccia Bread
You will be surprised how easily this comes together. But I bet you will be even more surprised when you first taste it!
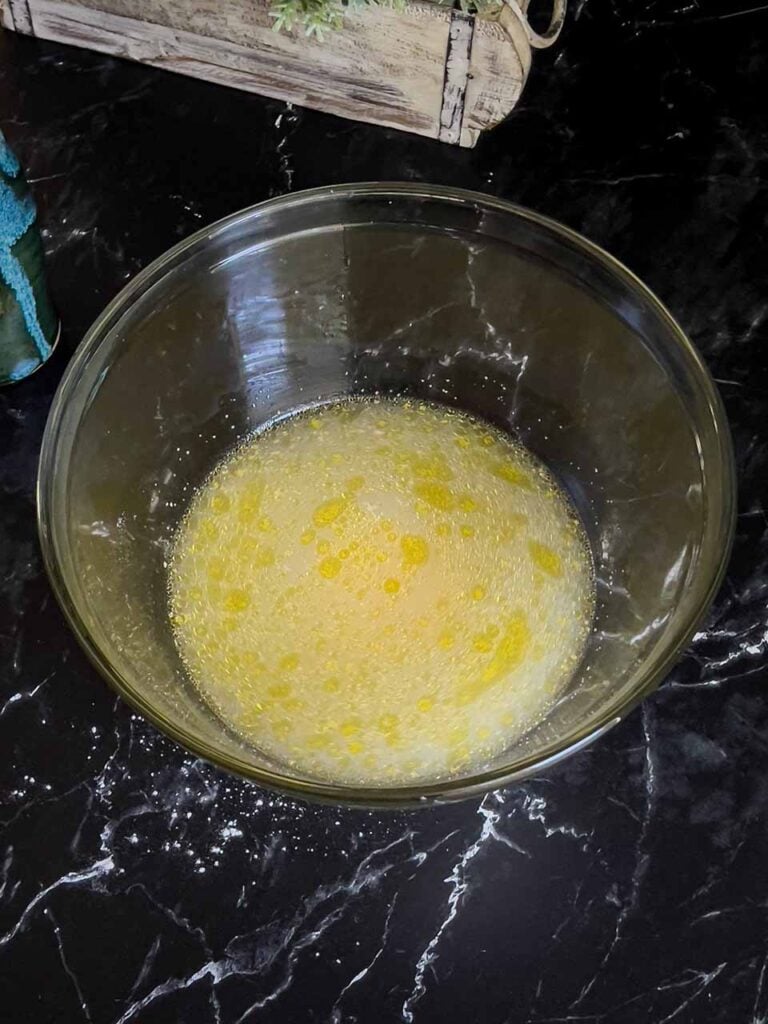
In a large bowl, combine the lukewarm water, instant yeast, olive oil, and honey.
Add the bread flour and kosher salt to a different bowl and whisk to combine.
Add the mixed flour and salt to the other bowl containing the water yeast mixture.
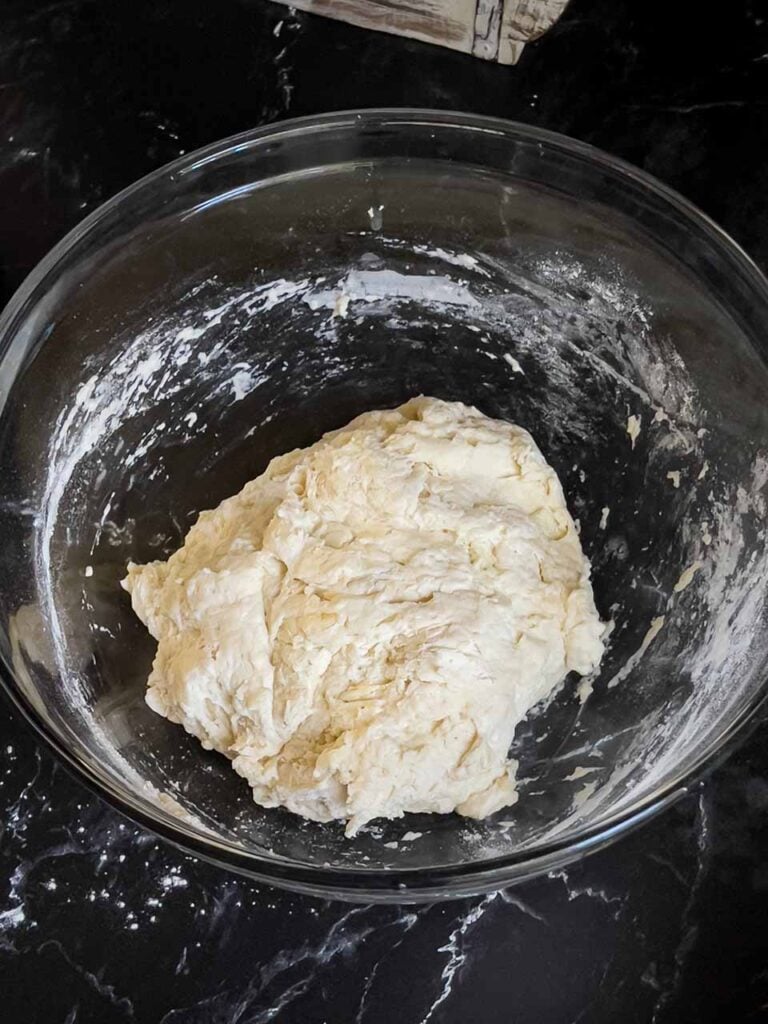
Using a spatula or large spoon, mix the ingredients until you see no more dry flour.
Cover the bowl with a towel or plastic wrap and let it rest for 10 minutes.
After the 10-minute rest, remove the cover from the dough. Dampen your hands and stretch and fold the dough over on itself.
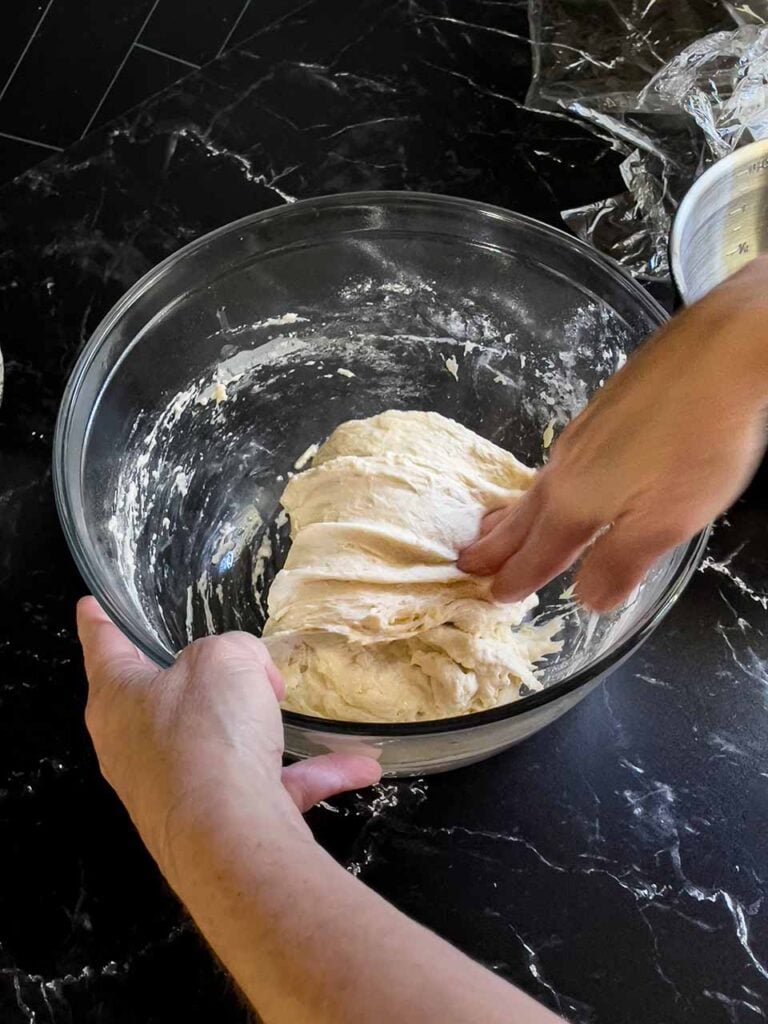
Do this by taking your hand at the 12 o’clock position and grab the dough. Stretch it over and pull it to the 6 o’clock position.
Turn the bowl a quarter turn and repeat that stretch and fold. Continue to turn the bowl, stretching and folding the dough until it becomes tight and will not stretch anymore.
This process promotes strong gluten in the bread.
Cover the dough and let it rest for 10 minutes.
Repeat the process one more time.
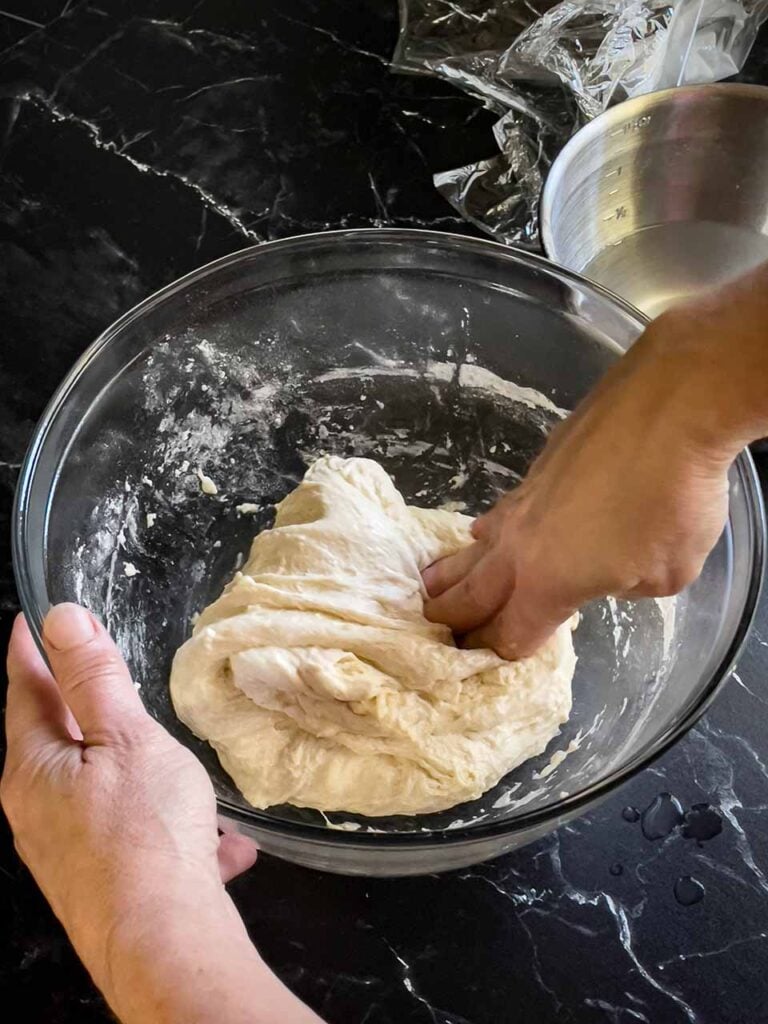
Stretch and fold the dough, turning the bowl until the dough tightens up and will no longer stretch.
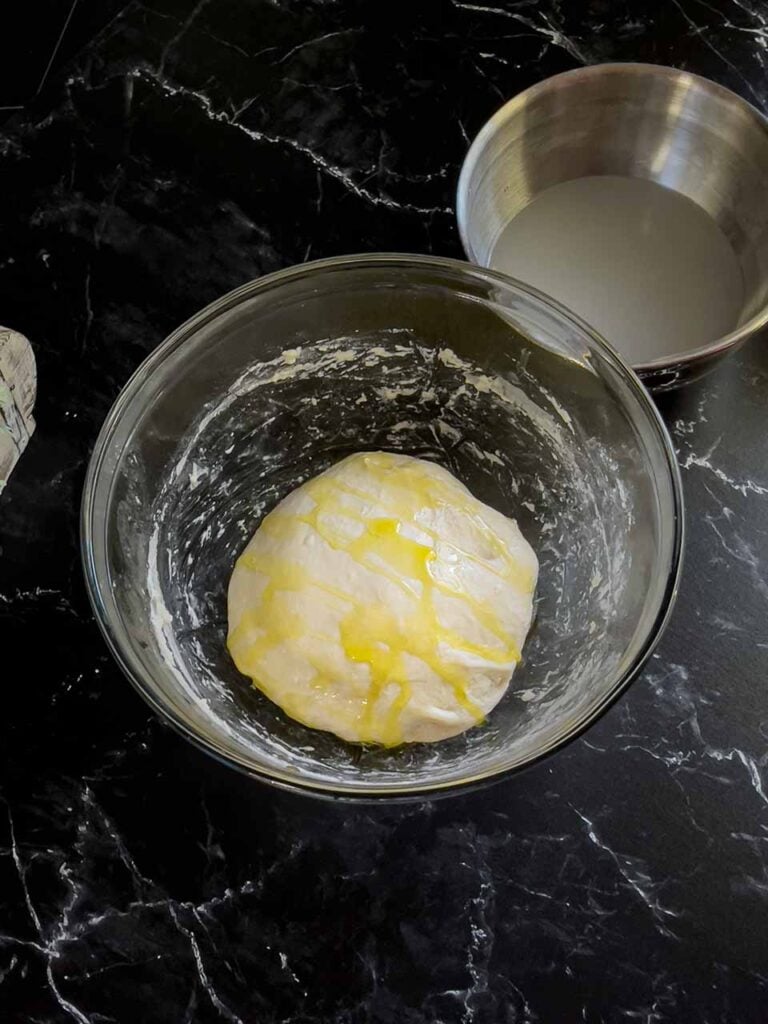
Dampen your hands and turn the dough over, so the seam side is down. Coat liberally with olive oil. Cover tightly with plastic wrap and refrigerate for 24 hours.
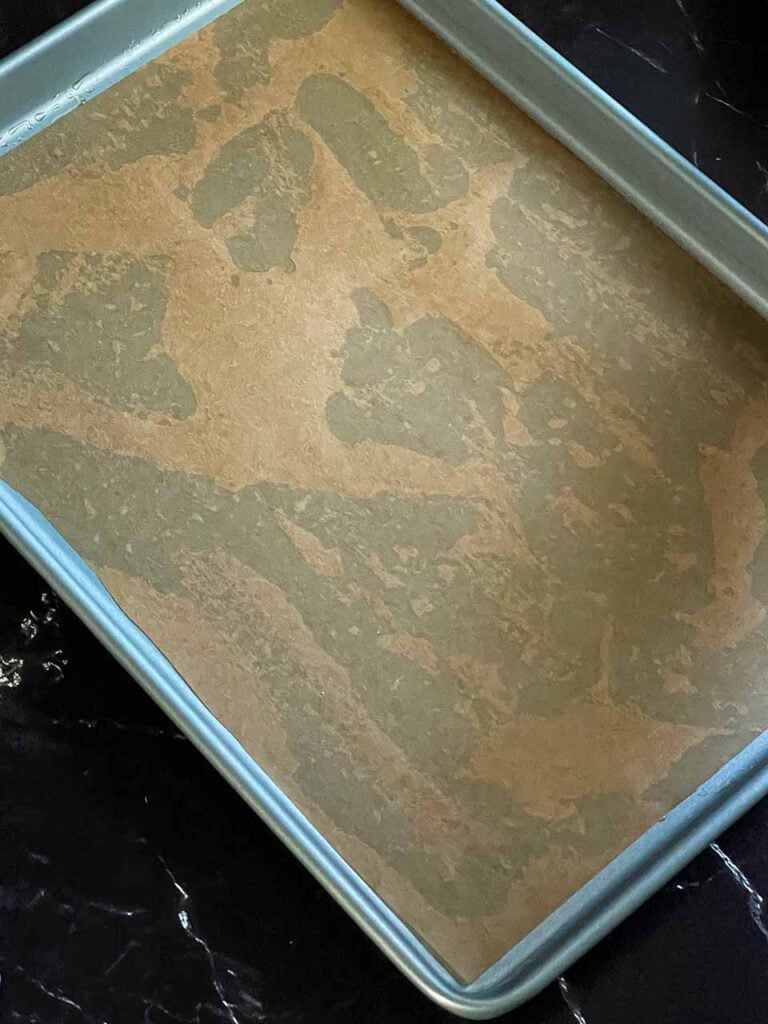
The next day, pour a little olive oil into a 9×13 baking sheet and spread it evenly across it. Add a sheet of parchment paper to the tray.
Top the parchment paper with 3 tbsp of olive oil and place the focaccia dough onto the baking sheet. Flip the dough over so that each side of the dough is coated in oil.
Oil your hands and, using your fingertips, spread the dough so it has a roughly even appearance.
Let the dough rise in a warm place for at least two hours (or more).
After two hours, give the baking sheet a shake or two. It should be doubled in size, jiggle, and be nice and fluffy.
At this point, preheat the oven to 430 degrees Fahrenheit.
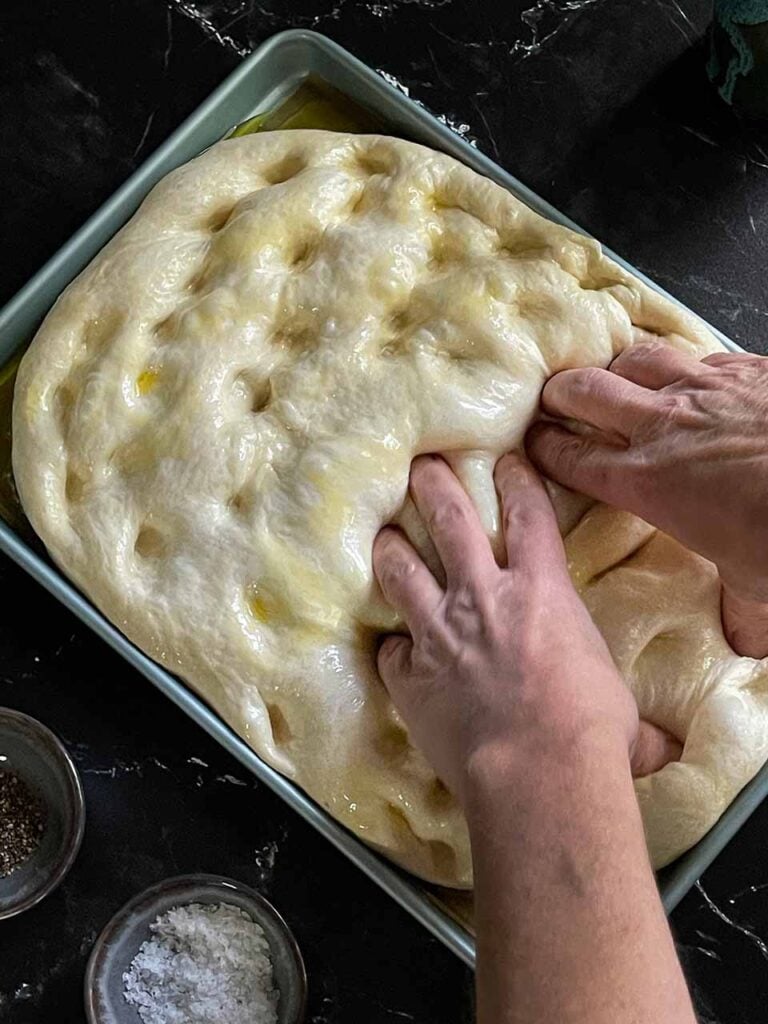
Oil your hands and press your fingers into the top of the dough, down to the baking sheet, creating dimples in the dough. While doing this, shape the dough to the shape of the baking sheet.
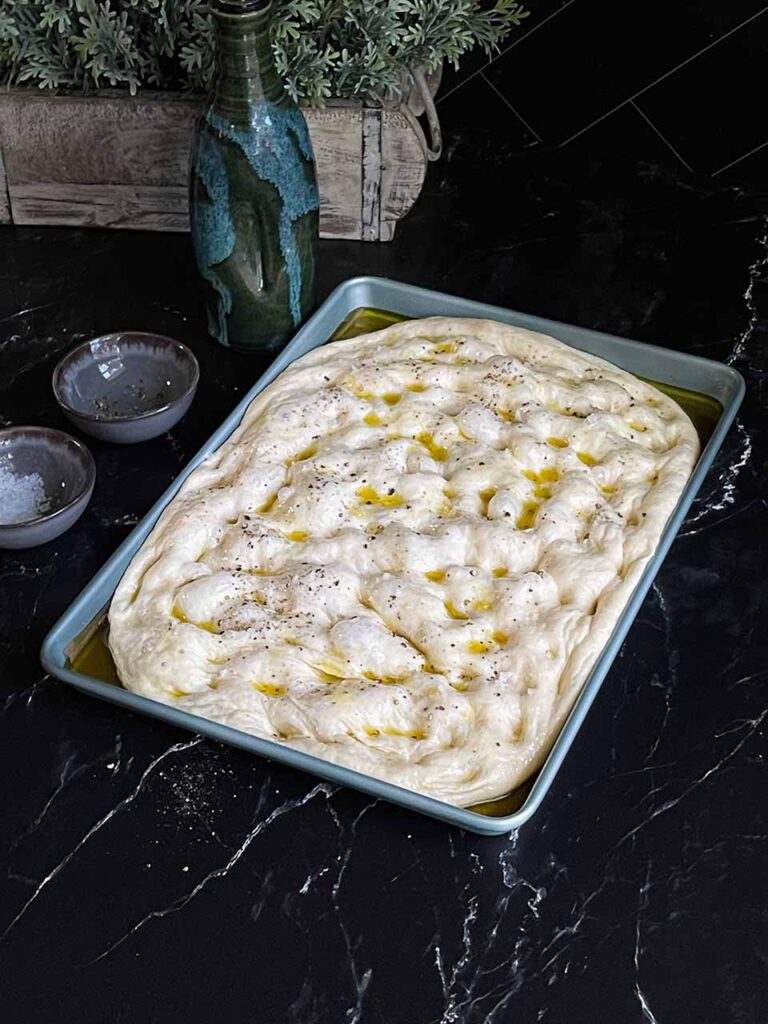
Top the focaccia dough with flaky sea salt and cracked black pepper. Drizzle additional olive oil liberally over the dough.
Bake for approximately 20 minutes until golden brown on the top.
Remove from the oven and allow the focaccia to cool in the pan for 5 minutes.
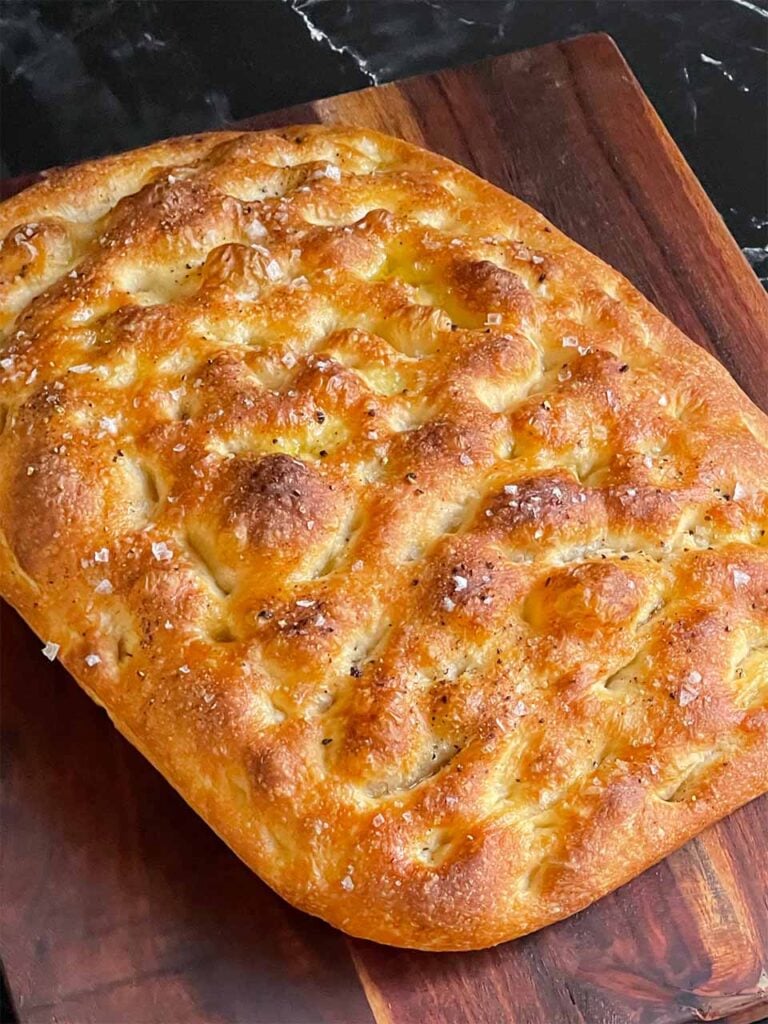
Remove the focaccia from the pan to a cooling rack. Allow it to cool for approximately 15 minutes before serving.
Slice it up any way you like. Cut in strips, squares, sandwich size … however you like.
Or just do what we do. Cut it into bite-sized portions, dip this amazing bread into some olive oil, and eat the entire thing over the counter in the kitchen.
However you serve it, you will be amazed at the great texture and deliciousness of this easy no-knead overnight focaccia bread.
😎 Variations
Our recipe calls for a simple topping; cracked black pepper and Maldon salt. Our preferred way of enjoying the insanely flavorful bread is to dip it in olive oil with added red pepper flakes, black pepper, and some fresh herbs.
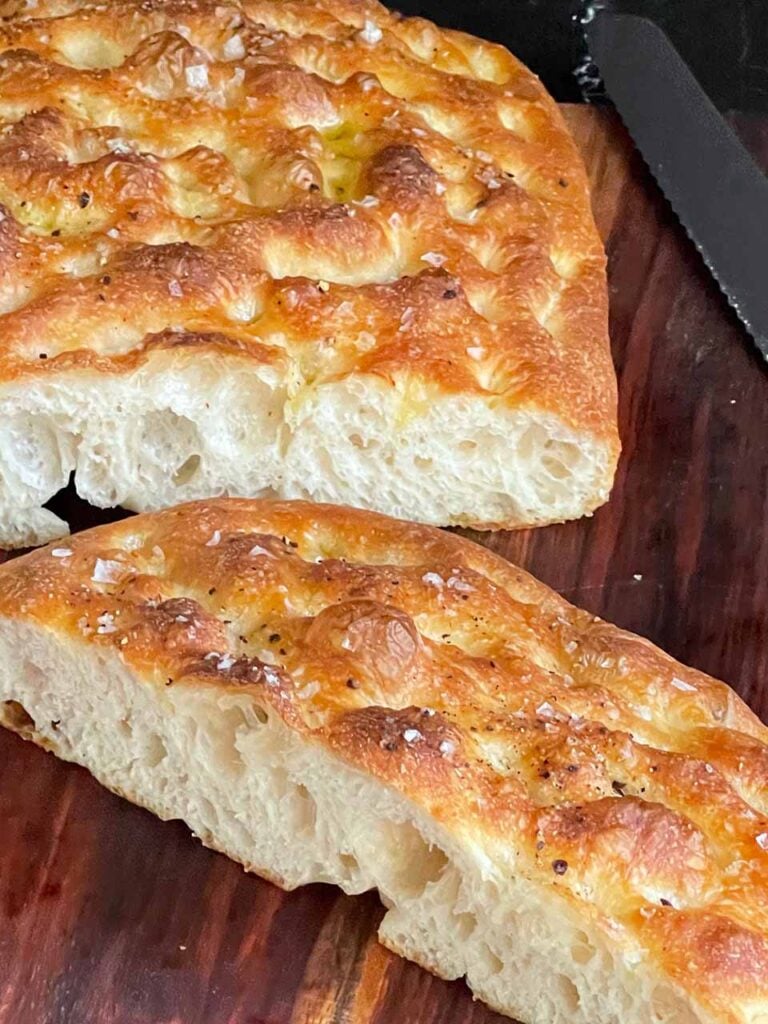
But this excellent bread can be topped with a wild amount of various toppings that suit your tastes.
- Top with additional herbs, such as fresh rosemary, oregano, and basil, for herbaceous focaccia.
- Top with various kinds of cheese, such as Romano, Feta, or Parmesan … or add them all!
- Top with olives and onions for a super savory focaccia.
- You can toss on some deli meats, such as hard salami, pepperoni, or capicola. Better yet, bake the bread and make a sandwich piled high with Italian meats and cheeses.
The sky is the limit with this bread. I recommend just making it as-is the first time so you can taste this wonderful bread with just some salt, pepper, and oil. It’s fantastic!
FAQ
Plain focaccia will be good for two days at room temperature if well wrapped. If the focaccia contains meat or dairy, it’s recommended to store it in the refrigerator for up to four days.
Yes. Place the room temperature focaccia bread in a freezer-safe container or zip-lock and freeze for up to 2 months.
Yes. To reheat, allow it to come to room temperature, then reheat at 375 degrees F until hot and crispy.
Other Amazing Bread Recipes
Easy No Knead Overnight Focaccia Bread Recipe
Ingredients
- 3 cup Bread flour plus 2 tbsp (423 grams)
- 1 1/2 cup Water lukewarm (344 grams)
- 1 tbsp Olive oil
- 2 tsp Kosher salt (10 grams)
- 1 tsp Instant yeast (4 grams)
- 1 tsp Honey (5 grams)
Instructions
- In a large bowl, mix the water, yeast, olive oil, and honey until combined.1 1/2 cup Water, 1 tbsp Olive oil, 1 tsp Instant yeast, 1 tsp Honey
- Whisk the flour and salt together in a separate bowl.3 cup Bread flour, 2 tsp Kosher salt
- Add the flour and salt to the large bowl containing the water and yeast mixture.
- Mix with a large spoon or spatula until well combined and no dry flour remains.
- Cover with a cloth or plastic wrap and allow it to rest for 10 minutes.
First Stretch And Fold
- After 10 minutes, remove the covering from the bowl. Wet your hand and stretch and fold the dough over on itself. Turn the bowl 1/4 turn and stretch and fold again. Continue to turn the bowl a 1/4 turn and stretch and fold until the dough tightens up and will no longer stretch.
- Cover and let the dough rest for 10 minutes.
Second Stretch And Fold
- Repeat the stretch and fold steps. Continue until the dough tightens up and will not stretch anymore.
- Dampen your hands (with water or oil) and turn the dough seam side down. Cover liberally with olive oil.
- Cover the bowl tightly with plastic wrap and place in the refrigerator overnight to 48 hours. A longer rest period will increase the flavor.
The Next Day
- Pour a little olive oil down on a 9×13 baking sheet. Spread it around so it's evenly coated.
- Add parchment paper to the baking sheet.
- Add an additional 3 tbsp of olive oil on top of the parchment paper.
- Place the focaccia dough onto the baking sheet. Flip the dough over so that each side of the dough is coated in oil.
- Oil your hands with olive oil and using your fingertips and spread the dough out a bit so it has a roughly even appearance.
- Cover the dough and allow it to rest for two hours.
- When the dough is ready it should be fluffy and jiggles when you shake the baking sheet.
- Preheat the oven to 430 degrees Fahrenheit.
- Oil your hands and press your fingers into the dough, down to the baking dish, creating dimples in the dough. While doing this, shape the dough to the shape of the baking sheet.
- Top the dough with a liberal amount of olive oil, cracked black pepper, and flaky salt (maldon salt). Optionally, add additional toppings such as red pepper flakes, rosemary, olives, etc.
- Bake for approximately 20 minutes until golden brown on the top.
- Remove from the oven and allow the focaccia to cool in the pan for 5 minutes.
- Remove the focaccia from the pan to a cooling rack. Allow it to cool for approximately 15 minutes before serving.







Love this recipe! Staple at our table!!
Great and best focaccia recipe. Have made it a few times and always comes out great..I am wondering if it could be made with a sour dough starter?
Hi
Love this recipe, made it a few times, I would now like to make it with a sour dough starter..is it possible with this exact recipe….meaning replace the instant yeast?
You could give it a whirl. I’d go with 120g of starter (roughly 1/2 cup). Since the starter is part liquid, reduce the water by 1/4 cup. I’d definitely do this overnight due to the fermentation time (it’s gonna be slower using starter). Let us know how it turns out! Good luck!! 🙂
This bread is amazing! The recipe was so easy and it turned out great with minimal effort. I loved it plain, and I’m about to try it with some meat toppings!
What is the brand and protein forming gluten percentage in the bread flour you used in this recipe? Not all bread flours have the same amount of protein,
Terry
We always use King Arthur bread flour with 12.7% protein.
What an incredible easy and delicous recipe you shared! It was easy to make and baked up beautifully. Fluffy and light on the inside with a delicate crisp crust on the outside. This recipe is ‘company worthy’ and makes a gorgeous presentation. Thank you so very much for sharing. 🙂
So easy and so delicious! Before baking,I brushed mine with a mixture of chopped fresh rosemary, crushed garlic clove, and olive oil. Heaven! My sister and I could not stop eating it.
I’m making this for the third time. Love this recipe. I let it proof in the fridge for at least 48 hours. When I put in pan I let it raise at least two and a half to three and a half hours. Turns out perfect every time! I gave some to a friend and she loved it. Best focaccia I have ever made! Thanks for sharing the recipe!!
Delicious, easy and versatile recipe.
The amount of people I’ve had to share this recipe with because they love it so much…this is so amazing thank you so much!
Just finished making this for the second time to take to a Christmas Eve dinner this evening. Both times I’ve let it rest for nearly 48 hours in the fridge. Both times I’ve let rise nearly three hours before baking (since it’s winter and taking a little longer.) It is beautiful, fluffy on the inside, a little crispy on the outside, and delicious! (I may have snitched a tiny piece while cutting it into squares to bring tonight!) But, I haven’t achieve the big air bubbles. Any ideas on what might affect that? The first time I thought maybe I was overly enthusiastic with the dimpling so I did less dimpling right before baking this time but still not huge air bubbles. I live at high altitude. Could that be affecting it? Regardless, it’s delicious. I just want to learn what I could tweak to achieve those air bubbles. Thanks for any tips you can give!
Sarah, focaccia is a bread that is still ok when overproofed because it doesn’t need to hold shape. Try allowing it to proof before baking until it’s bubbly and jiggly in the pan. This will depend on the temp of your kitchen and can take up to 4 hours. I usually put mine in the oven with the light on when rising. Don’t be afraid to give it loads of dimples! I tend to “go to town” when dimpling. I use both hands and go all over the dough. I hope this helps.
Thank you! I will give it even longer to rise next time and give it plenty of dimples. 🙂
Hi, you need to do the stretch and fold before leaving the dough in the fridge overnight. This is how bubbles appear. Also, the good flour, with protein, is very important for developing the gluten. I use Manitoba, for example, and for other focaccia recipe mix it with a little semola. Follow the instructions and you’ll get it! It’s worth it! 😊
Don’t be shy, press down all the way nearly until you feel the pan! Always gives me air bubbles that are huge 😄
I’m making this tomorrow for Christmas snacking. I just w at to say THANK YOU for adding the ingredient measurements right into the step by step directions! Brilliant and so handy.
Thanks, Sindi! We love it too.
Made this for the first time. I let it proof 36 hours. It came out amazing! I followed the directions exactly. Am making another one to take to friends this weekend! Highly recommend this recipe great results! Than you
I’m wondering if it’s better to let the dough rest on stovetop, or put back in the fridge for the 2 hours right before baking?
Hi, Mary. It needs to proof (rise) at room temperature before baking.
Thank you! This bread though, wowza! And thank you for sharing the recipe, will make again and again!
Hi! Can this be made in a woodfire oven? Thank you!
If you can maintain the temperature, there is no reason why it wouldn’t work. We’ve baked sourdough on our smoker before.
Made only half the recipe today. Glad I did. … because I ate almost the whole thing by myself! Will make again, love the up to 48 fridge time, so little work for such a great result.
Thanks for sharing.
Chris, this happens to us all the time! We devoured almost an entire pan just passing through the kitchen every few minutes. LOL
What about subbing gluten free flour?
Hi, Nicole. We have never used gluten free flour. Try this recipe
Don’t do it!! I subbed gf flour and it was an epic fail 😭
Wonderful recipe, thank you!
I added a couple of tablespoons of rye flour. Used walnut oil instead of olive oil. Dimpled in cranberries and walnuts.
Good stuff!
This sounds delicious! Would King Arthur white whole wheat work?
Hi, Joan. We have never used whole wheat for this focaccia recipe. But here’s a link that should answer your question.
I have no space in My refrigerator 😬 can I leave it in room temperature instead ?
Instead of folding the dough can I just use bread machine to knead it ? Thx
Refrigerating the dough is what yields flavorful, pillowy, and fluffy focaccia. You can make this bread the same day, but it won’t have the depth of flavor as refrigerating the dough. If you want to make it the same day after the folding process, place the dough in the prepared pan, and let the dough rise until pillowy and jiggly about 1 to 2 hours. Then bake as instructed. I don’t recommend folding the dough in a bread machine. I think it would overwork the dough. I hope this helps!
My first attempt and it is was AWESOME. Had out of town friends and they go just raved over it. Will definitely make again. THANKS
So happy to hear you enjoyed the recipe, Bev! Thank you for coming by.
Update re my Italian bread comment…my mistake in using APF instead of bread flour! Big difference.
I’m confused regarding the oil-on-pan and oil-on parchment process. Why the parchment? To more easily flip the dough?
Sorry, our reply has taken a bit, Tony. Yay!!! So glad the bread worked for you. We place the oil on the pan (just enough) to keep the parchment paper from sliding around. The focaccia can tend to stick to the pan if you don’t use parchment paper.
I just finished making your focaccia recipe…..great result! Light and airy crust, just as your picture. This is definitely a go-to recipe!
Yay!!!!! Tony, thank you so much for taking the time to drop in and let us know you enjoyed the recipe. Have a great weekend!
This is my go-to focaccia recipe now, I’ve made it a dozen times now. I usually have to add a tiny bit more flour than it calls for, but then it’s perfect. Thanks for an easy, fool proof recipe.
Glad you like it. We like it, too!! (too much, sometimes).
TEMPERATURE?????
Preheat the oven to 430 degrees Fahrenheit.